Manual provisioning
You need to have administrative access to your Slack workspace to provision a new app.
Due to Slack limitation of free accounts (free accounts can only see messages from 90 days) it is strongly recommended to provision migration app with paid account
Log in to Slack
-
Open your web browser and go to the Slack website https://slack.com
-
Log in to your Slack workspace using your admin credentials.
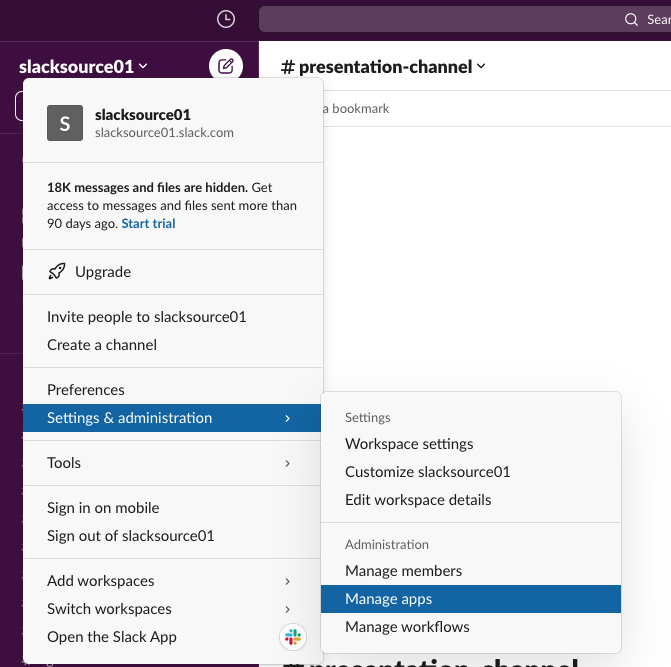
Access the App Directory
In the Slack interface, click on your workspace name in the top left corner to open the workspace menu. Then, select “Settings & administration” and then click on “Manage apps” to access the Slack API Dashboard.
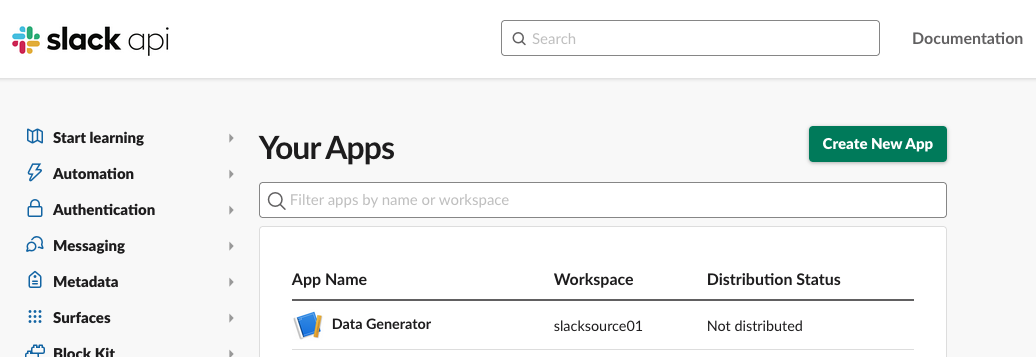
Create a New App
In the Slack API Dashboard, click on “Build” on the left sidebar.
Then, click on “Create New App” to start the process of creating a new app.
Configure Basic Information
When asked how to create app - select “From an app manifest”.
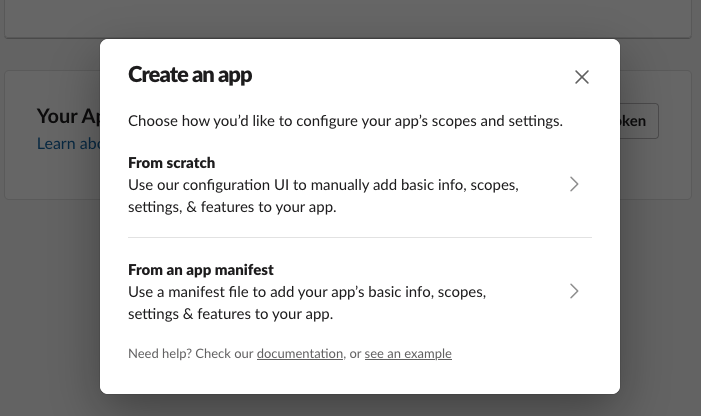
Select your workspace and paste following YAML definition for app:
display_information:
  name: Slack Import
features:
  bot_user:
    display_name: Slack Import
    always_online: false
oauth_config:
  redirect_urls:
    - https://localhost:4200
  scopes:
    user:
      - channels:history
    bot:
      - channels:read
      - channels:history
      - users:read
      - users:read.email
settings:
  org_deploy_enabled: false
  socket_mode_enabled: false
  token_rotation_enabled: false
Below table explains granted permissions and why we need to use them:
| Granted permissions | Why we need this permission |
|---|---|
| channels:read | To get list of channels existing in slack workspace |
| channels:history | To get information about conversations in channels |
| users:read | To get list of workspace members |
| users:read.email | To get each user email (to simplify creation of user mapping list) |
After clicking “Create” your app will be created and you will be navigated to app page.
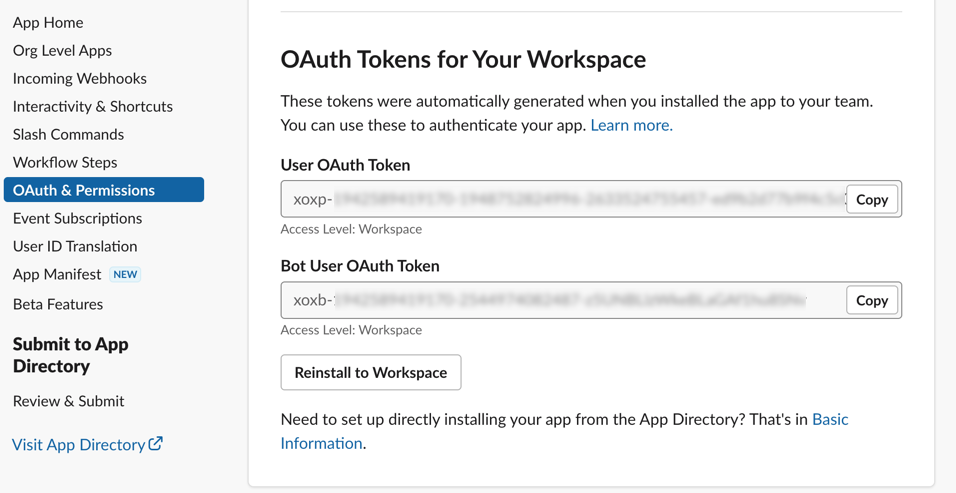
Obtaining Tokens
Click “OAuth & Permissions” and store User OAuth Token and Bot User OAuth Token values:
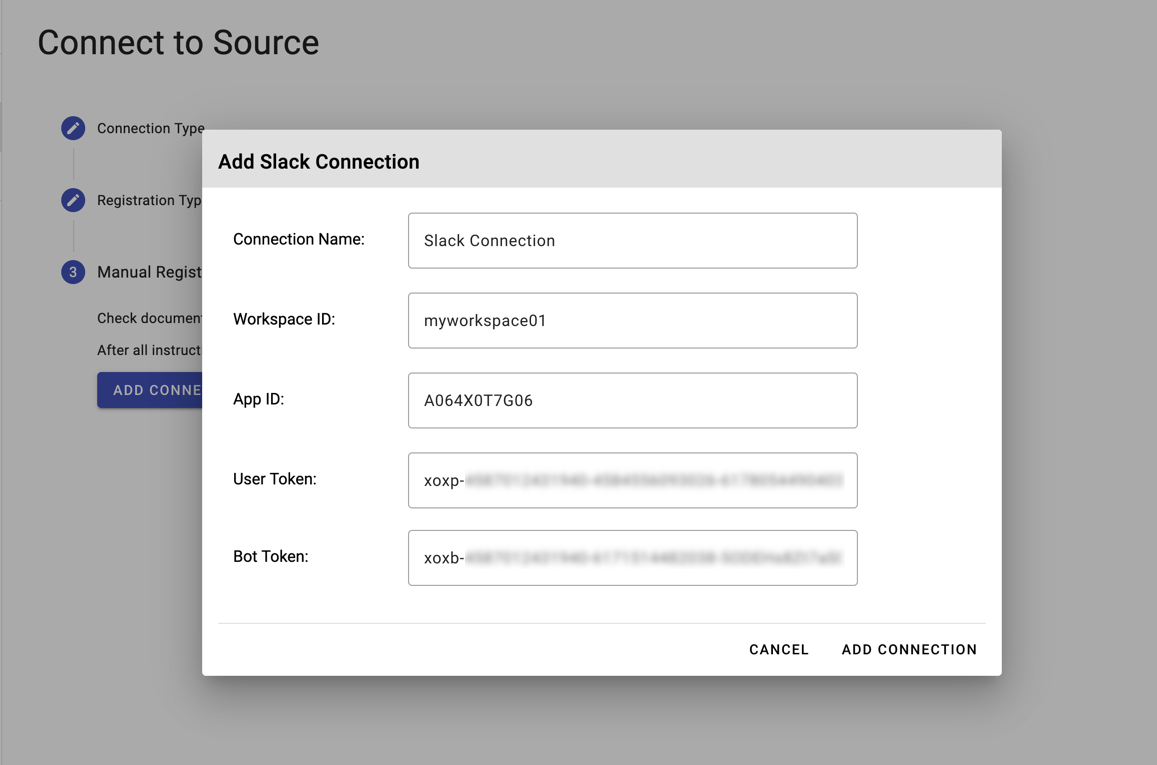
Registering app in client portal
Go back to Slack manual registration dialog. Fill out required fields to proceed with manual registration:
Automated provisioning
The detailed steps involved in this process are integrated into the connections process inside provisioning app. Refer to internal instructions provided in connections app.